Welcome to the website for landscape facilities products and knowledge.

How to customize the size of wooden flower boxes?
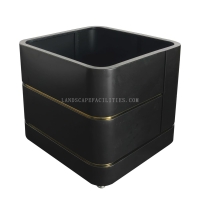
Customizing the size of wooden flower boxes is a great way to add a personal touch to your garden decor. Whether you're a DIY enthusiast or looking for a unique planter solution, here's how you can create flower boxes that fit your space perfectly.
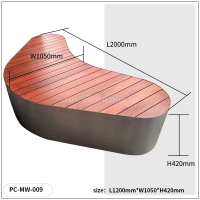
1. Measure Your Space: Start by measuring the area where you want to place the flower box. Consider the width, depth, and height to ensure it fits seamlessly into your garden or balcony.
2. Choose the Right Wood: Select durable wood like cedar or redwood, which are resistant to rot and insects. These materials ensure your flower box lasts for years.
3. Cut the Wood to Size: Use a saw to cut the wood according to your measurements. If you're not confident with tools, many hardware stores offer cutting services.
4. Assemble the Box: Secure the pieces together using screws or nails. Pre-drill holes to prevent the wood from splitting. Add a bottom piece with drainage holes to allow excess water to escape.
5. Sand and Finish: Smooth the edges with sandpaper to avoid splinters. Apply a weather-resistant finish or paint to protect the wood and enhance its appearance.
6. Fill with Soil and Plants: Once your custom flower box is ready, fill it with soil and your favorite plants or flowers.
By following these steps, you can create wooden flower boxes that are not only functional but also a beautiful addition to your outdoor space. Customizing the size ensures they fit perfectly, whether for a small balcony or a sprawling garden.
Related search: