Welcome to the website for landscape facilities products and knowledge.

What are the installation steps for wooden flower boxes?
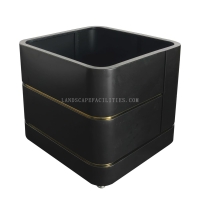
Installing wooden flower boxes is a great way to add charm and greenery to your outdoor space. Follow these simple steps to ensure a successful installation:
1. Choose the Right Location: Select a spot that receives adequate sunlight and complements your garden or patio layout. Ensure the area is level and accessible for watering and maintenance.
2. Prepare the Wooden Flower Box: If your flower box is unfinished, sand the surfaces to remove rough edges and apply a weather-resistant sealant or paint to protect it from the elements.
3. Measure and Mark: Use a measuring tape to determine the exact placement of the flower box. Mark the spots where you’ll attach it, whether it’s on a railing, wall, or freestanding.
4. Secure the Flower Box: For wall-mounted boxes, use sturdy brackets or screws to attach the box securely. For freestanding boxes, ensure the base is stable and level. If attaching to a railing, use clamps or brackets designed for this purpose.
5. Add Drainage Holes: If your flower box doesn’t already have drainage holes, drill a few small holes in the bottom to prevent waterlogging and promote healthy plant growth.
6. Line the Box: Place a layer of landscape fabric or a plastic liner inside the box to protect the wood from moisture and soil.
7. Fill with Soil and Plants: Add high-quality potting soil and arrange your chosen plants or flowers. Be sure to leave enough space for growth and proper root development.
8. Water and Maintain: After planting, water thoroughly and establish a regular watering and fertilizing schedule to keep your plants thriving.
By following these steps, you can create a beautiful and functional wooden flower box that enhances your outdoor space for years to come.
Related search: